
Yii 1.1 is one of famous PHP MVC (Model-View-Controller) frameworks. Although Yii 2.x had launched with big change in structure, Yii 1.1 will still be worth attention as some existing systems are running under it by now. With its Gii component, WebApp developing staff can create Model class with ease, and therefore leverage CRUD operations on database.
All codes here are not complicated, so you can easily understand even though you are still students in school. To benefit your learning, we will provide you download link to a zip file thus you can get all source codes for future usage.
Estimated reading time: 6 minutes
EXPLORE THIS ARTICLE
TABLE OF CONTENTS
BONUS
Source Code Download
We have released it under the MIT license, so feel free to use it in your own project or your school homework.
DOWNLOAD GUIDELINE
- Prepare HTTP server such as XAMPP or WAMP in your windows environment.
- Download and unzip into a folder that http server can access.
SECTION 1
Quick Start
A quick way to generate WebApp on Yii 1.1 framework reduces the time you will spend in developing a PHP website. When developing with Yii you will be writing code in an object oriented fashion, so make sure you have this concept. Considering stability, we illustrate the example by the up-to-date version 1.1.21 April 2, 2019.
Yii 1.1 Document
Yii 1.1 MVC framework in PHP will be introduced here along with the topic of user authentication. If you hope to study more about it, the document link The Definitive Guide to Yii 1.1 will help.
Yii 1.1 Package
If you would like to download packages, please refer to List of all Yii 1.x releases. For example, put the decrypted package version 1.1.21 April 2, 2019 into a folder named YiiPath just under website root directory.
Yii 1.1 Command Lines
Yii 1.1 for PHP WebApp comes with a command line tool called yiic that can create a skeleton Yii application for you to start with. On Linux, type in the following commands:
$ cd YiiPath/framework
$ ./yiic webapp ../../a0005
On Windows, type in the following commands:
cd YiiPath\framework
yiic webapp ..\..\a0005
Once finishing the command lines, a new Yii Web application will be created in a folder named as a0005 in the same folder that YiiPath located in. The way to access new WebApp is to navigate http://localhost/a0005/index.php.
SECTION 2
My Web Application
In the seciton, we are learning what part Yii 1.1 PHP WebApp will be customized for according to MVC features. For example, we should authenticate users by accessing MySQL database, instead of using hard-coded password.
Yii 1.1 PHP Bootstrap
<?php
// change the following paths if necessary
$yii=dirname(__FILE__).'/../yii/framework/yii.php';
$config=dirname(__FILE__).'/protected/config/main.php';
// remove the following lines when in production mode
defined('YII_DEBUG') or define('YII_DEBUG',true);
// specify how many levels of call stack should be shown in each log message
defined('YII_TRACE_LEVEL') or define('YII_TRACE_LEVEL',3);
require_once($yii);
Yii::createWebApplication($config)->run();
Here shows the entry point http://localhost/a0005/index.php for Yii 1.1 WebApp. It is not only starting point, but also set up constants for developing mode and trace level. In other words, if developing phase has finished, you can comment YII_DEBUG flag upon launching WebApp. Therefore, WebApp will be running in production mode with only error messages in log files, and not including debuging messages.
Yii 1.1 WebApp Layout
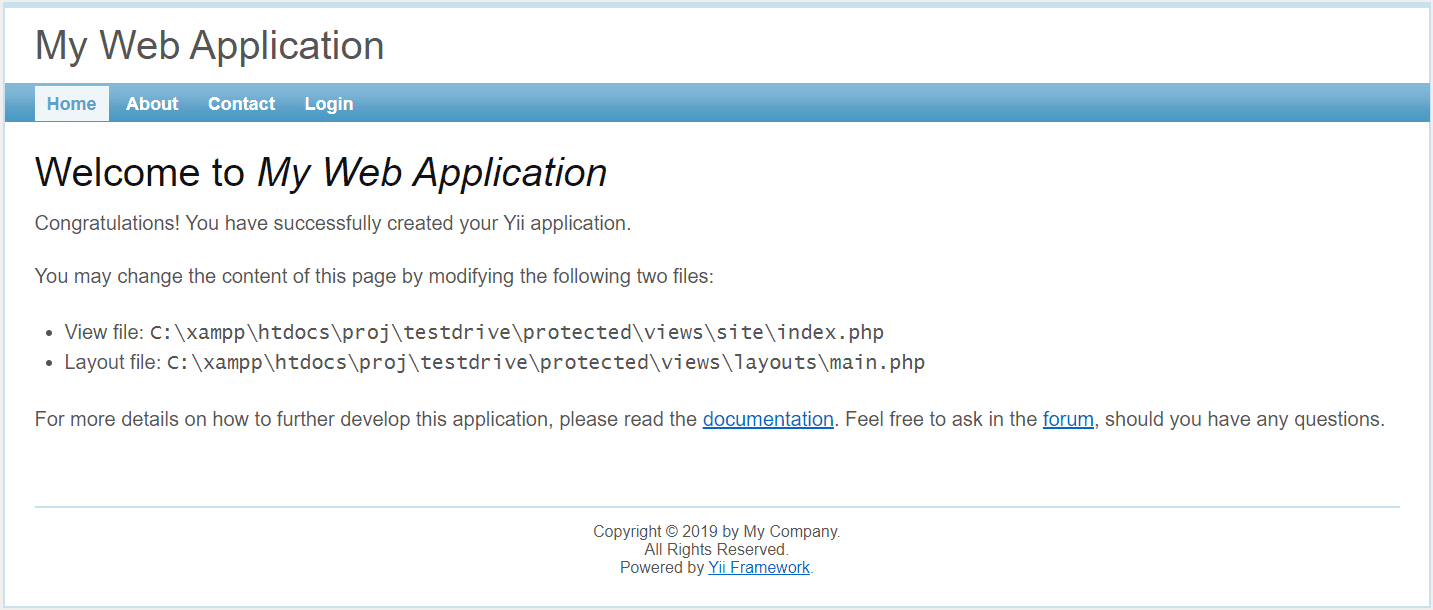
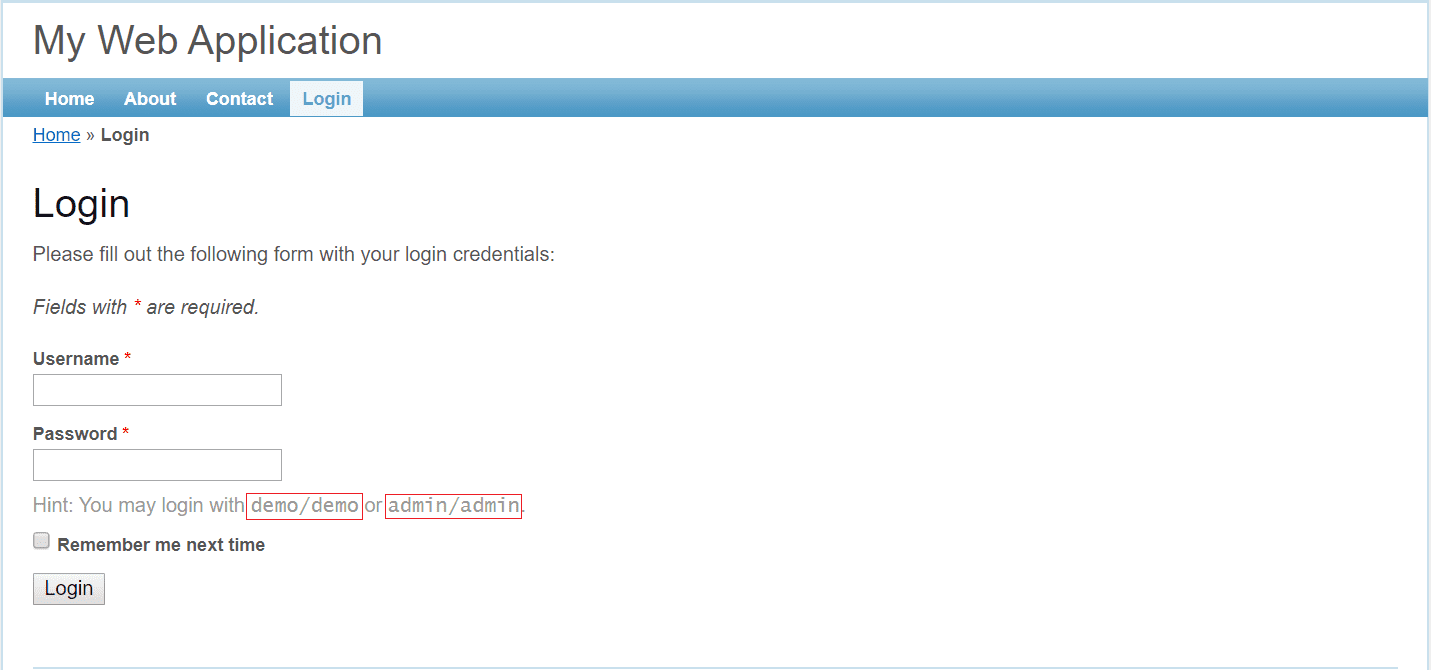
An awesome homepage as shown has included an essential login mechanism, but unfortunately, the login form display a hint that two pairs of ID’s and passwords are hard-coded. Thus let us learn how to move them into database for flexibility.
Yii 1.1 User Authentication
<?php
...
class UserIdentity extends CUserIdentity
{
    ...
    public function authenticate()
    {
        $users=array(
            // username => password
            'demo'=>'demo',
            'admin'=>'admin',
        );
        if(!isset($users[$this->username]))
            $this->errorCode=self::ERROR_USERNAME_INVALID;
        elseif($users[$this->username]!==$this->password)
            $this->errorCode=self::ERROR_PASSWORD_INVALID;
        else
            $this->errorCode=self::ERROR_NONE;
        return !$this->errorCode;
    }
}
Yii applications are built upon components which are objects written to a specification, while this component is in charge of user authentication. If you want to learn more, see The Definitive Guide to Yii 1.1 for details. Here we just let you know where hard-coded data has been, and that is what we will change.
SECTION 3
Gii Usage
Let us learn how Gii is enabled and what Gii will create for data access. Beside Model, Gii can generate Controllers and Views. Eventually, you will learn to move hard-coded passwords into database.
Enable Gii
    ...
    'modules'=>array(
        // uncomment the following to enable the Gii tool
        /*
        'gii'=>array(
            'class'=>'system.gii.GiiModule',
            'password'=>'Enter Your Password Here',
            // If removed, Gii defaults to localhost only. Edit carefully to taste.
            'ipFilters'=>array('127.0.0.1','::1'),
        ),
        */
    ),
	...
To enable Gii, you should follow several steps. First, locate the configuration file main.php. Next, uncomment Gii codes, and then set password for Gii start up by 'password'=>'Enter Your Password Here'.
Prepare Database
<?php
// This is the database connection configuration.
return array(
    'connectionString' => 'sqlite:'.dirname(__FILE__).'/../data/a0005.db',
    // uncomment the following lines to use a MySQL database
    /*
    'connectionString' => 'mysql:host=localhost;dbname=a0005',
    'emulatePrepare' => true,
    'username' => 'root',
    'password' => '',
    'charset' => 'utf8',
    */
);
To help Gii locate your database and tables, please find configuration file database.php, comment SQLite codes, and then uncomment MySQL codes. If already had a database, type values in attributes of host, dbname, username, and password that Gii will refer to for creating Models. Table schema and the data to be inserted are listed below.
CREATE TABLE `yiiusers` (
  `name` varchar(255) COLLATE utf8_unicode_ci NOT NULL,
  `pass` varchar(10) COLLATE utf8_unicode_ci NOT NULL
) ENGINE=InnoDB DEFAULT CHARSET=utf8 COLLATE=utf8_unicode_ci;
ALTER TABLE `yiiusers`
  ADD PRIMARY KEY `name` (`name`);
INSERT INTO `yiiusers` (`name`, `pass`) VALUES
('demo', 'demo'),
('admin', 'admin');
Gii Start Up
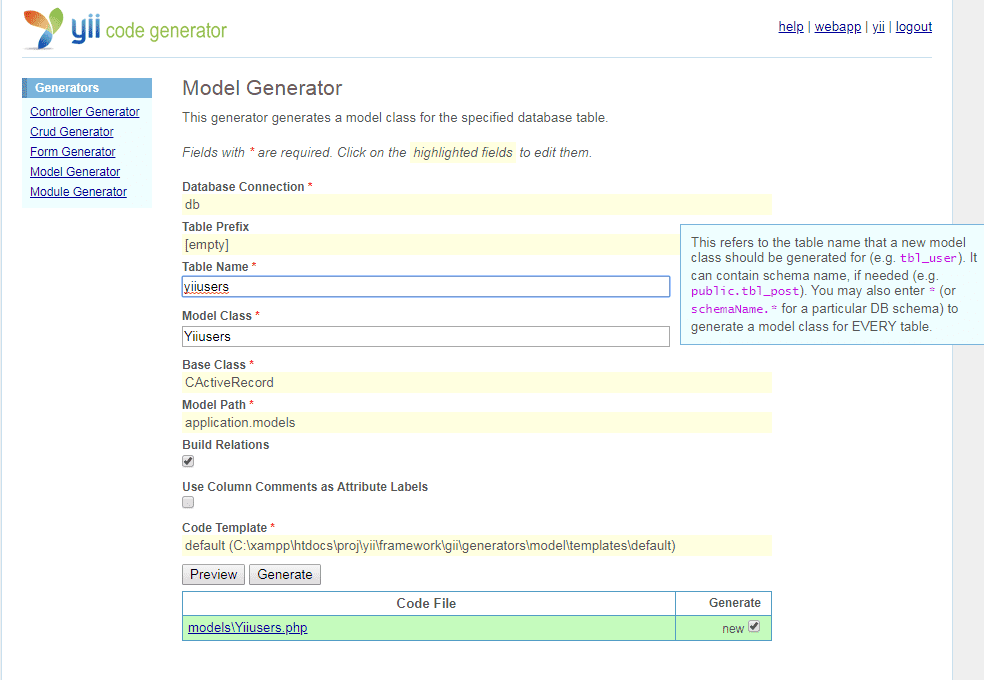
Browsering http://localhost/a0005/?r=gii will lead you to the Gii module. Click Model Generator on the left, and type in the table name yiiusers that new model class should be generated for, At this time, system bring out a name in Model class field, so please choose to preview and confirm if available.
Not Hard-Coded Password
<?php
...
class UserIdentity extends CUserIdentity
{
    ...
    public function authenticate()
    {
        $record=Yiiusers::model()->findByAttributes(array('name'=>$this->username));
        if($record===null)
            $this->errorCode=self::ERROR_USERNAME_INVALID;
        else if($this->password!==$record->pass)
            $this->errorCode=self::ERROR_PASSWORD_INVALID;
        else
            $this->errorCode=self::ERROR_NONE;
        return !$this->errorCode;
    }
}
Let’s change the way how user identification is performed by using database, instead of hard-coded pairs. From database, object-oriented style writing Yiiusers::model()->findByAttributes(array('name'=>$this->username)) return an id-password pair that must meet the critera of name = username and pass = password for correct user authentication. Visit http://localhost/a0005/?r=site/login and give it a try.
FINAL
Conclusion
Moreover, clicking Controller Generator on the left of Gii lets you generate MVC Controllers, while clicking CRUD Generator will bring MVC Views for the Yii 1.1 PHP WebApp. Thank you for reading, and we have suggested more helpful articles here. If you want to share anything, please feel free to comment below. Good luck and happy coding!
Suggested Reading
- 6 Stages of Registration Form in PHP with Email Check
- 5 Steps to AJAX Login Form with Small PHP DB Class
- Small PHP CRUD Class for OOP using MySQL