Apart from softwares like Photoshop, PHP image functions can resize, add an effect to, or put a watermark on an image. Resizing will reduce the storage of mass uploaded pictures. Image filter can append a specific effect to an image. The watermark on an image prevent creative pictures or photographs from misappropriation.
All codes here are not complicated, so you can easily understand even though you are still students in school. To benefit your learning, we will provide you download link to a zip file thus you can get all source codes for future usage.
Estimated reading time: 7 minutes
EXPLORE THIS ARTICLE
TABLE OF CONTENTS
BONUS
Source Code Download
We have released it under the MIT license, so feel free to use it in your own project or your school homework.
Download Guideline
- Prepare HTTP server such as XAMPP or WAMP in your windows environment.
- Download and unzip into a folder that http server can access.
TIP 1
Image Resize
In the beginning, the most common action is to resize an image in PHP. Though it creates no effect on images, websites use the utility to reduce storage of mass uploaded photos.
Copy and Re-Sample
Suppose the original file is of JPEG format, and its size is 600×400. We want to resize it to be 300×200. First, a GD function imagecreatefromjpeg() reads the image file to produce an image resource $img.
Next, the other GD function imagecreatetruecolor() create a template of new size. it is referred as a destination image file.
Finally, copying and re-sampling are done. The PHP GD library function imagecopyresampled() copies the source area of { xpos:0, ypos:0, width:600, height:600 } to the destination area of { xpos:0, ypos:0, width:300, height:200 }. That obviously resize the image.
// Image Resize
function image_resize($src, $w, $h) {
    $img = imagecreatefromjpeg($src);
    $oldw = imagesx($img);
    $oldh = imagesy($img);
    $template = imagecreatetruecolor($w, $h);
    imagecopyresampled($template, $img, 0, 0, 0, 0, $w, $h, $oldw, $oldh);
    return $template;
}
imagejpeg(image_resize("$path/pic1.jpg", 300, 200), "$path/pic1-resize.jpg");
The function image_resize() return an image resource. Therefore, you can display it on screen layout, or just save the image resource as a resized JPEG file as the above does.
TIP 2
Image Crop
Similar to image resizing, its major difference from image resizing is ignoring the original image size. Thus, there is no condensing effect. The PHP GD function re-samples an image from source to destination with different start positions, but the same size.
Re-Sample with The Same Size
Let’s consider the requirement of cutting part of an image. We generate image resources of source and destination at first. Next, the GD function imagecopyresampled() copies the source area of { xpos:80, ypos:110, width:250, height:210 } to the destination area of { xpos:0, ypos:0, width:250, height:210 }. That indeed cuts part of an image to create another image.
// Image Crop
function image_crop($src, $x, $y, $w, $h) {
    $img = imagecreatefromjpeg($src);
    $template = imagecreatetruecolor($w, $h);
    imagecopyresampled($template, $img, 0, 0, $x, $y, $w, $h, $w, $h);
    return $template;
}
imagejpeg(image_crop("$path/pic1.jpg", 80, 110, 250, 210), "$path/pic1-crop.jpg");
The function image_crop() return an image resource. Therefore, you can display it on screen layout, or just save the image resource as a cut JPEG file.
TIP 3
Image Convert
Converting image file formats is required sometimes. The example is able to convert source images of type JPEG, GIF, BMP, WBMP, GD2, and WEBP to be of PNG format.
Change JPEG to PNG
Suppose that we convert JPEG format to PNG format for image files. Other combinations of conversion are left as your exercises.
The PHP function file_get_contents() gets binary data from a JPEG image file. And then the GD function imagecreatefromstring() generates an image resource from an image file. Supported source image types are JPEG, PNG, GIF, BMP, WBMP, GD2, and WEBP.
Finally, the GD function imagepng() save the image resource into a destination PNG image file.
// Image Convert
function image_conv_png($src, $dst, $quality) {
    $data = file_get_contents($src);
    $img = imagecreatefromstring($data);
    imagepng($img, $dst);
}
image_conv_png("$path/pic1.jpg", "$path/pic1-png.png", 50);
The conversion involves a quality factor. It ranges from 0 to 99, so the quality of 50 indicates normal or middle level.
TIP 4
Image Filter
Image processing softwares use mathematical algorithms to add any effect to images. PHP image functions can also do it in a programmatic manner. We will list several common filters, and implement only one filter of the embossed effect.
Mathematical Filters
A PHP Image filter is the algorithm used to add a specific effect on images. They consist of brightness, contrast, and so on. To implement it on an image, you can use PHP function imagefilter() with different effect parameters.
- IMG_FILTER_BRIGHTNESS: Changes the brightness of the image.
- IMG_FILTER_CONTRAST: Changes the contrast of the image.
- IMG_FILTER_GRAYSCALE: Converts the image into grayscale.
- IMG_FILTER_EDGEDETECT: Uses edge detection to highlight the edges in the image.
- IMG_FILTER_EMBOSS: Embosses the image.
- IMG_FILTER_GAUSSIAN_BLUR: Blurs the image using the Gaussian method.
- IMG_FILTER_MEAN_REMOVAL: Uses mean removal to achieve a “sketchy” effect.
- IMG_FILTER_SMOOTH: Makes the image smoother.
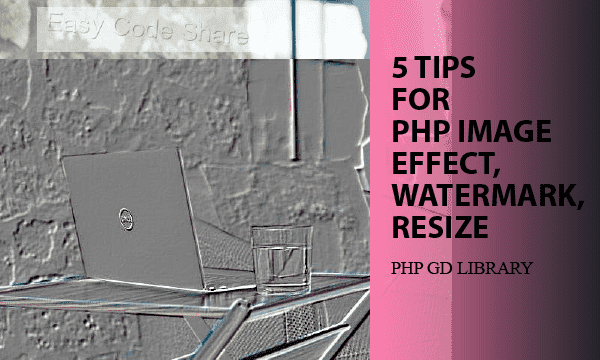
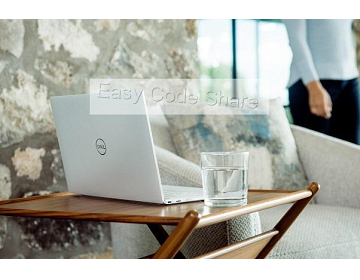
In this example, we choose only the embossed feature to let you know how it works. Compared with the original photo, sculpted scenes are raised above the background plane.


The PHP function imagecreatefromjpeg() generate an image resource from an image file. Then another PHP function imagefilter() modifies the image resource with specified effect.
// Image Filter
function image_filter($src, $effect) {
    $img = imagecreatefromjpeg($src);
    imagefilter($img, $effect);
    return $img;
}
imagejpeg(image_filter("$path/pic1.jpg", IMG_FILTER_EMBOSS), "$path/pic1-filter.jpg");
The function image_filter() return an image resource. Therefore, you can display it on screen layout, or just save the image resource as a filtered JPEG file.
TIP 5
Image Watermark
The process includes two steps. One is to create a text-based watermark of truetype font format. The other is to merge watermark and original image. In addition, we use shadowed text to make watermarks nice-looking.
Create a Text Stamp
Usually, the purpose of putting watermarks on images is to prevent pictures from stealth or misappropriation. To do it, we want to create am text-based image resource as a stamp.
First, a file of truetype font is necessary. The GD function imagecreatetruecolor() create a stamp template of 300×60 as an image resource.
The GD function imagecolorallocate() create colors for the image resource. And then the function imagefilledrectangle() draws a rectangle with white background. Finally, put the text shadow and text string subsequently. Both of them are of a font size and an adjusted angle.
// Image Water Mark
function image_watermark($src, $dst, $stamp_x, $stamp_y){
    $fontfile = dirname(__FILE__) . "/arial.ttf";
    $text = "Easy Code Share";
    $stamp_w = 300;
    $stamp_h = 60;
    $stamp = imagecreatetruecolor($stamp_w, $stamp_h);
    $white = imagecolorallocate($stamp, 255, 255, 255);
    $grey = imagecolorallocate($stamp, 128, 128, 128);
    imagefilledrectangle($stamp, 0, 0, 300, $stamp_h, $white); // create rectangle
    $angle = -4;
    $fsize = 26; // font size
    $font_x = 10;
    $font_y = 30;
    // add shadow
    imagettftext($stamp, $fsize, $angle, $font_x+1, $font_y+1, $grey, $fontfile, $text);
    // add text
    imagettftext($stamp, $fsize, $angle, $font_x, $font_y, $white, $fontfile, $text);
    // merge image and stamp
    $img = imagecreatefromjpeg($src);
    $pct = 50;
    imagecopymerge($img, $stamp, $stamp_x, $stamp_y, 0, 0, $stamp_w, $stamp_h, $pct);
    imagejpeg($img, $dst);
}
image_watermark("$path/pic1.jpg", "$path/pic1-watermark.jpg", 150, 100);
Merge Stamp and Image
Along with the prepared stamp image resource, we can merge it and an image resource $img form the original image by GD function imagecopymerge(). Moreover, the parameter $pct a is transparency factor. If pct = 0, no action is taken, when 100 there is no transparency. We choose a middle level of 50.
FINAL
Conclusion
PHP GD library have more capability than the image functions we have enumerated here. To realize any feature or effect of them, you should take practices on your focused topics.
Thank you for reading, and we have suggested more helpful articles here. If you want to share anything, please feel free to comment below. Good luck and happy coding!
Suggested Reading
- 6 Methods for File Upload in PHP, HTML, AJAX, jQuery
- 6 Stages of Registration Form in PHP with Email Check
TRY IT
Quick Experience
That is all for this project, and here is the link that let you experience the program. Please kindly leave your comments for our enhancement.
Try It Yourself
Click here to execute the source code, thus before studying the downloaded codes, you can check whether it is worthy.