
Upon Apache CGI, Python scripts play the role of HTTP web server that accepts both single and multiple file upload. In the article, first, we review methods of file upload in HTML browser, and then focus on Python scripts about how to receive and store files.
All codes here are not complicated, so you can easily understand even though you are still students in school. To benefit your learning, we will provide you download link to a zip file thus you can get all source codes for future usage.
Estimated reading time: 5 minutes
EXPLORE THIS ARTICLE
TABLE OF CONTENTS
BONUS
Source Code Download
We have released it under the MIT license, so feel free to use it in your own project or your school homework.
Download Guideline
- Install Python on Windows by clicking Python Downloads, or search a Python setup pack for Linux.
- The installation package for Windows also contains pip install, which allow you to obtain more Python libraries in the future.
SECTION 1
HTML Form File Upload
At the beginning, let us review the method of file upload in browser clients. Both HTML and JavaScript are available. In addition, to upload a single file and multiple files are similar, but different.
Browser File Upload Approach – Form
To upload files from browsers, form is the basic and popular approach. No matter you use HTML tag <form> or JavaScript form object. As below, in HTML, the enctype="multipart/form-data" is a necessary attribute.
<!-- Using HTML form -->
<form action="fileupload.py" method="post" enctype="multipart/form-data">
    <input type="file" name="myfile">
    <input type="submit" value="Upload Single File">
</form>
If you leverage jQuery Mobile to enforce the UI design in mobile phones, you have to add an extra attribute such as data-ajax=”false”.
<!-- Adjust for jQuery Mobile -->
<form action="fileupload.py" method="post" enctype="multipart/form-data" data-ajax="false">
Because using a multipart form with a file input is not supported by Ajax in jQuery Mobile, the attribute will ensure the submission of form to the server. See jQuery Mobile Form elements for more.
Alternatively, you can use JavaScript and HTML as the following. The form data encapsulate the file into a JavaScript object, and then jQuery sent the form data to the Python web app in Apache.
<!-- Using JavaScript form object -->
<form id="form">
    <input type="file" name="myfile">
    <input type="submit" value="Upload">
</form>
<script>
    $("#form").submit(function(e){
        e.preventDefault();
        var formData = new FormData($("#form")[0]);
        // ignored
    });
</script>
If you are not familiar with file upload in client sites, refer to our previous post 6 Methods for File Upload in PHP, HTML, AJAX, jQuery.
Single vs Multiple – File Upload
The ways to single file or multiple file upload in HTML are different but similar, beside the attribute of multiple in the tag input.
- Single :
<input type='file' name='myfile'> - Multple :
<input type='file' name='myfile' multiple>
However, the point is the key myfile in structured data. In the example, Python http server in Apache identifies the key to retrieve file upload.
SECTION 2
Python HTTP File Upload Server
In python, accepting file upload are of two methods, single or multiple. The example integrates them as a Python web server in Apache. Moreover, a little bit of concept of Apache CGI is mentioned.
Determine Single or Multiple File Upload
This concise example can handle both single and multiple file upload at a time. Having received the form object with the key myfile, Python scripts check whether the object is of Python list format or not. If yes, move to the multiple case; otherwise, treat as single file upload.
    filefield = form['myfile']
    if isinstance(filefield, list) :
        # Multiple files uploaded
        print('<p>Check uploaded multiple images: </p>')
        for fileitem in filefield :
            fn = fileitem.filename
            with open("upload/{}".format(fn), 'wb') as f :
                f.write(fileitem.file.read())
            print('<img width="200" height="auto" src="upload/{}" /><br><br>'.format(fn))
    else :
        # Single file uploaded
        print('<p>Check uploaded image: </p>')
        fn = filefield.filename
        with open("upload/{}".format(fn), 'wb') as f :
            f.write(filefield.file.read())
        print('<img width="200" height="auto" src="upload/{}" />'.format(fn))
For each file uploaded, write the content to be a file in the folder upload. However, how is the browser client able to check whether uploading is successful or not? We design the response as a series of HTML tag <img> reflecting the locations of successful file upload in Python web server.
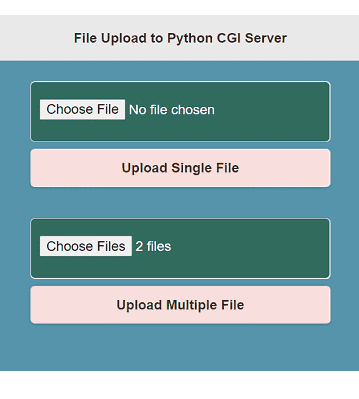
The html layout indicates when 2 files are selected to upload, click button to upload multiple files. Once done, Python http server in Apache will reply with two HTML tags <img> that display images by urls as below.

Python Web App
Continuing the post that discusses the configuration of Apache CGI for Python web apps in Linux Ubuntu, CentOS, and Windows, let us include Python CGI library by import cgi.
You can get HTTP GET or POST parameters in the same way cgi.FieldStorage().
 import cgi
 # Get GET/POST parameters
 form = cgi.FieldStorage()
Thus, HTML and JavaScript in browser can directly make a request to Python scripts for services.
FINAL
Conclusion
Other than PHP file upload server, Python scripts can also work as a web server in Apache CGI. And no complex coding skills are required.
Thank you for reading, and we have suggested more helpful articles here. If you want to share anything, please feel free to comment below. Good luck and happy coding!
Suggested Reading
- 4 Practices for Python File Upload to PHP Server
- Multiple File Upload in PHP, HTML, jQuery by 6 Ways
- WSGI App in Python under Apache mod_wsgi